How to Set Up Obsidian LiveSync: Step-by-Step Guide
Learn how to set up the Obsidian LiveSync plugin step by step. Configure CouchDB, enable end-to-end encryption, and sync your Obsidian vault across all your devices.
Simon
Obsidian LiveSync is one of the most popular community plugins for syncing an Obsidian vault across multiple devices. It uses CouchDB replication together with the LiveSync plugin to provide near real-time synchronization while supporting end-to-end encryption. Although the underlying technology is sophisticated, setting it up is surprisingly straightforward. The initial setup usually takes around five minutes.
What is Obsidian LiveSync?
LiveSync is a community-built plugin that replaces file-based synchronization (like iCloud or Dropbox) with a database-driven approach. By using CouchDB replication together with the LiveSync plugin, it synchronizes changes continuously across your devices and greatly reduces the risk of sync conflicts.
Do I need my own CouchDB server?
Yes and no. The plugin itself requires a CouchDB database to function. You can either host and maintain this server yourself (which requires technical knowledge), or you can use a managed service that handles the infrastructure for you. If you're new to LiveSync, using a managed CouchDB provider is often the quickest way to get started because you can skip the server setup entirely.
Here is how to configure LiveSync securely:
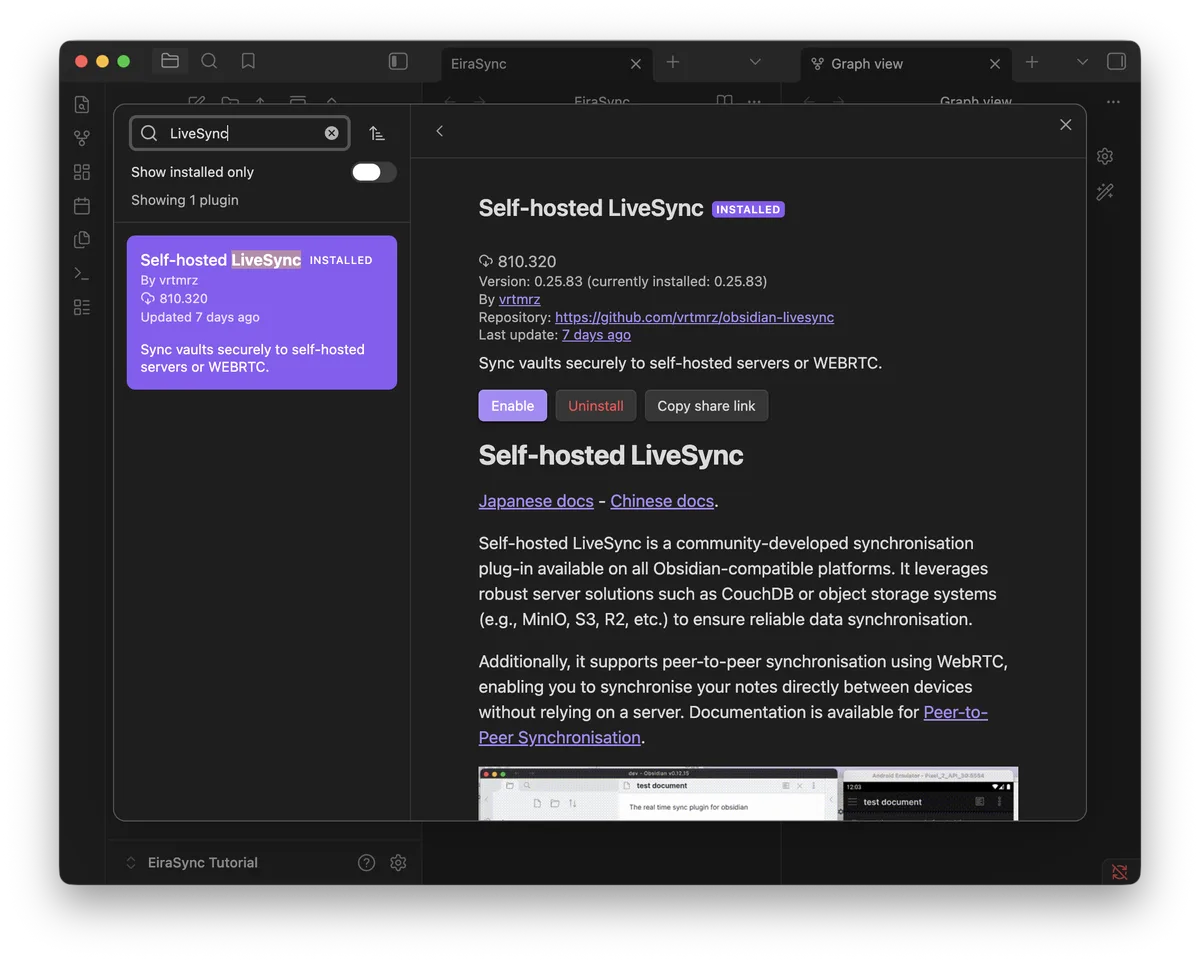
Step 1: Install the Plugin
Start on your primary device (e.g., your Mac or PC) where your main Obsidian vault is located.
- Open Obsidian and go to Settings > Community plugins.
- Turn off Restricted mode if you hadn't already.
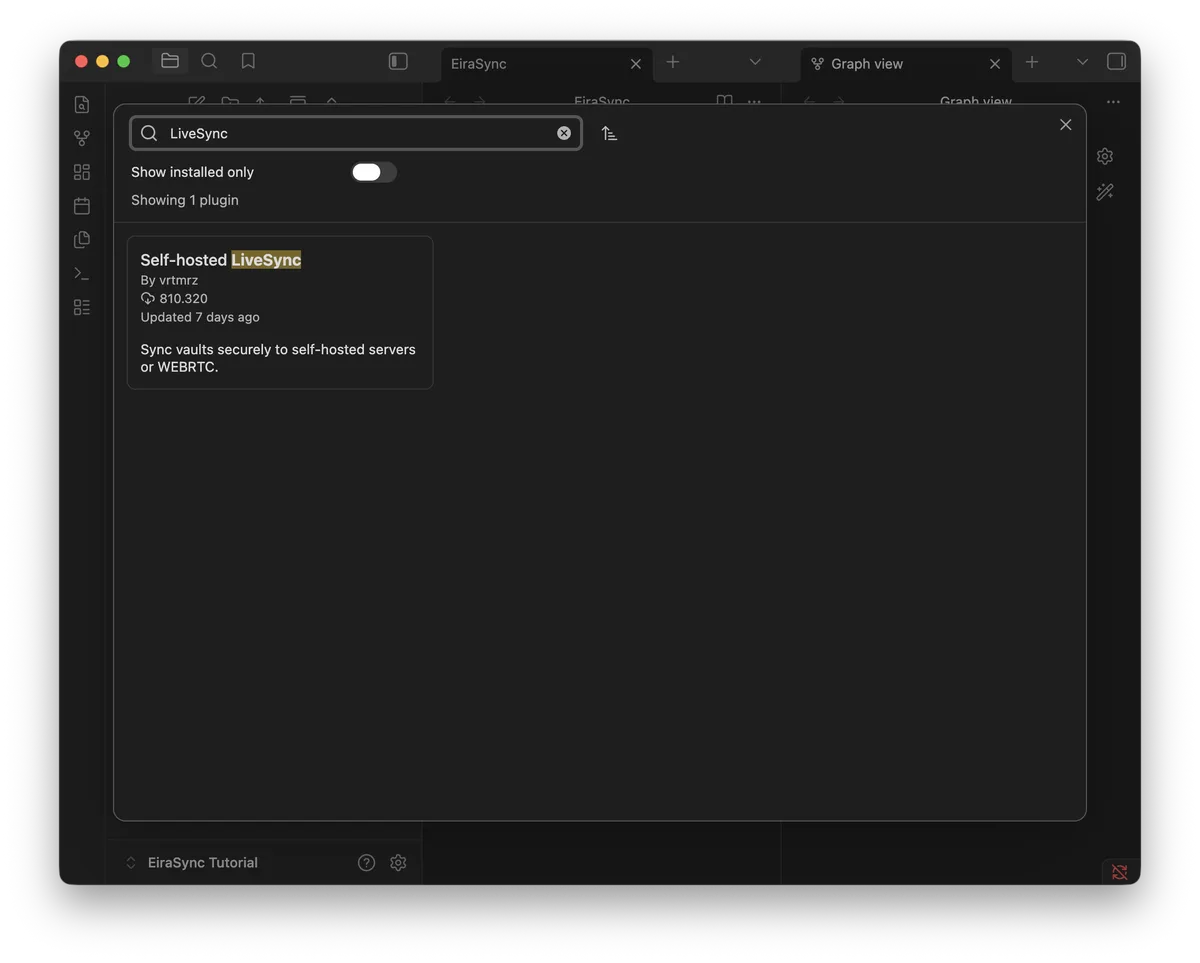
- Click Browse and search for
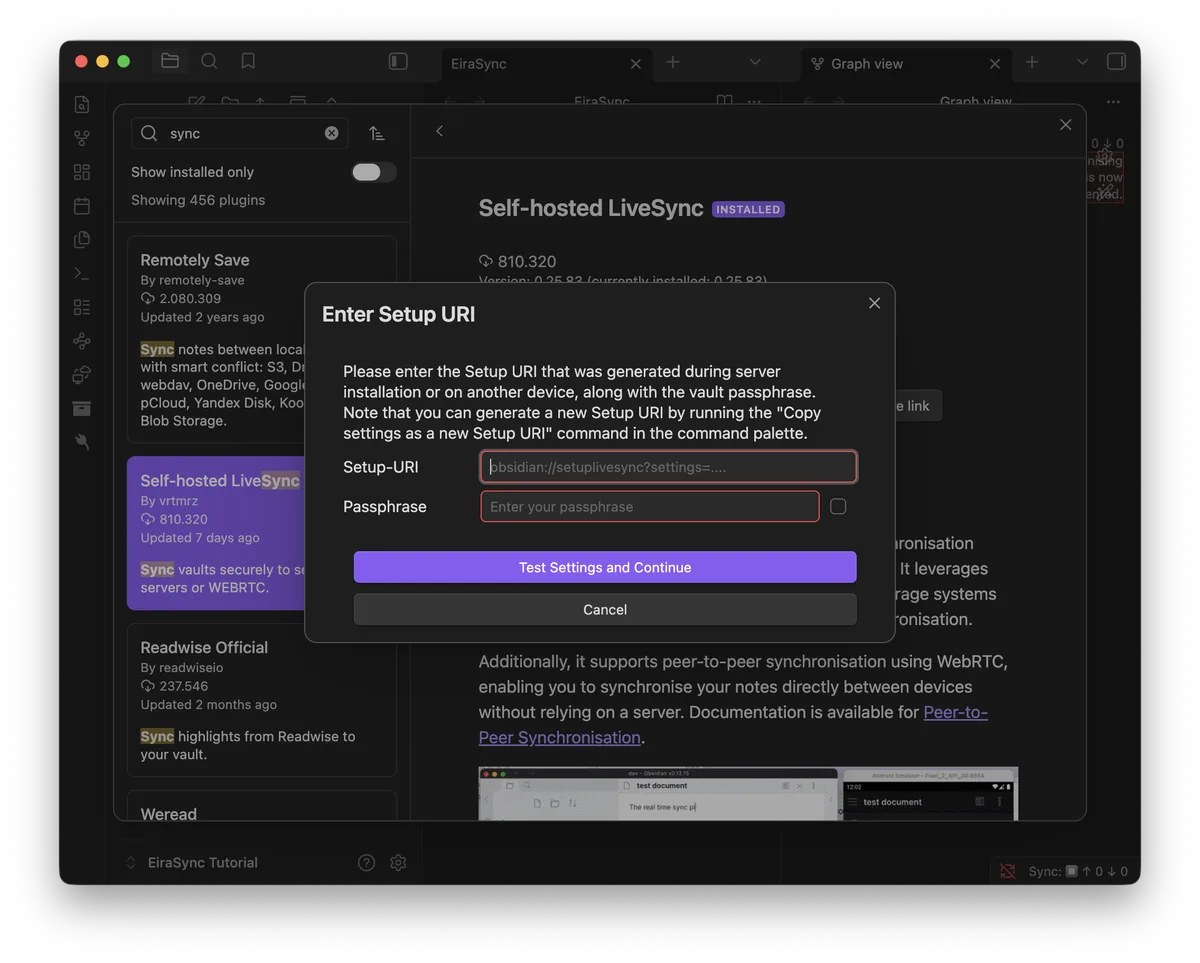
Self-hosted LiveSync. - Click Install and then Enable.
Step 2: Configure Your Database Backend
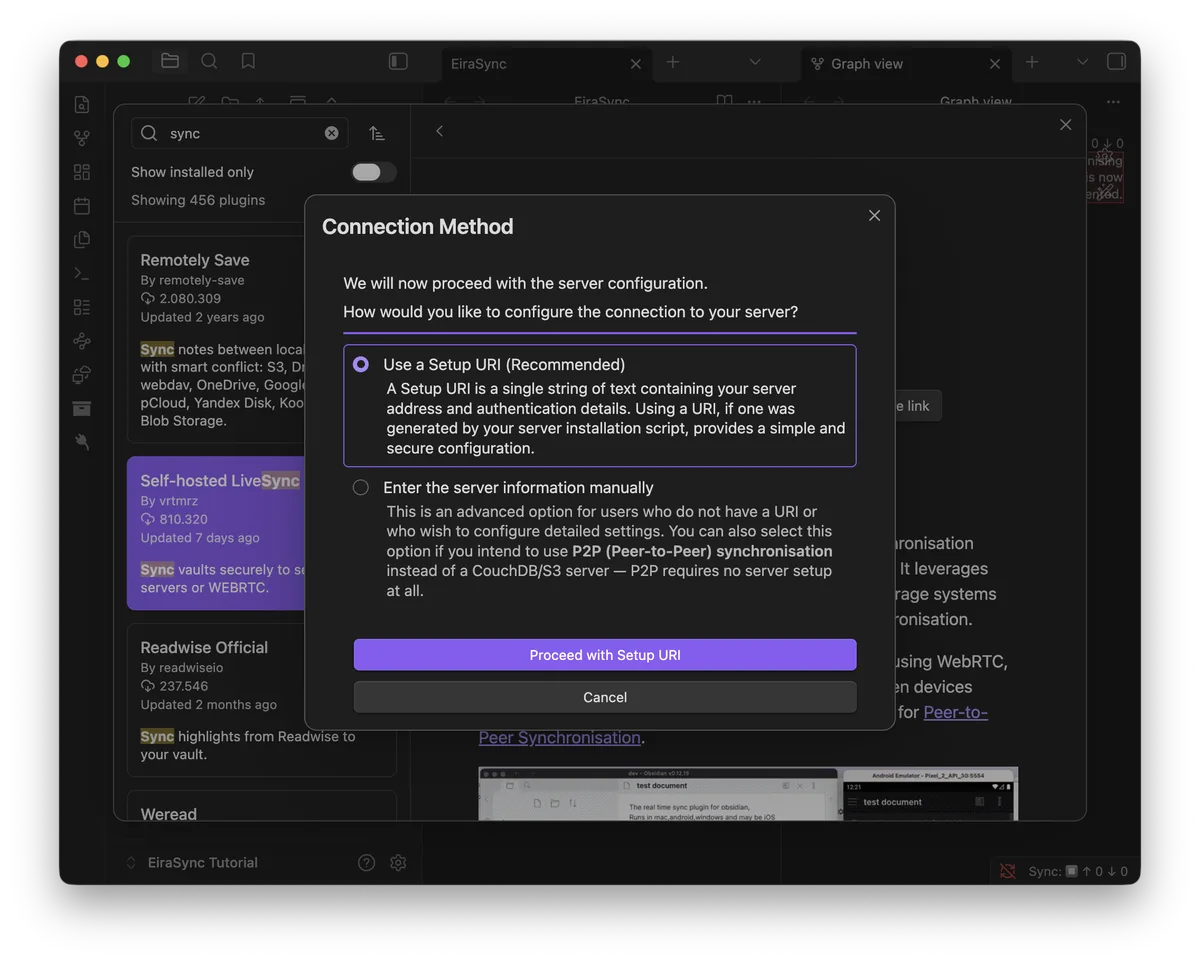
When you enable the plugin, you are usually greeted by a Setup Wizard. This guided process is the safest way to configure your connection.
The steps differ depending on whether you use a managed provider or self-host CouchDB:
Managed provider (e.g. EiraSync)
- Create a vault in your EiraSync dashboard.
- Copy the Setup URI and Setup URI passphrase shown once in the setup dialog.
- In Obsidian, choose Use a Setup URI in the wizard and paste the link.
- When prompted, enter the Setup URI passphrase from your dashboard.
EiraSync automatically generates two separate secure passphrases when you create a vault:
- a Setup URI passphrase (shown in the dashboard — you enter this in Obsidian to decrypt the link), and
- an E2EE passphrase for your vault contents (embedded inside the encrypted Setup URI).
You do not choose either passphrase yourself, and there is no manual E2EE step in LiveSync's plugin settings. End-to-end encryption is already enabled in the Setup URI.
Self-hosted CouchDB
- Choose Enter the server information manually in the wizard.
- Fill in Server URI, Username, and Password for your own CouchDB instance.
With either path, your notes should be encrypted locally before upload. With EiraSync, that is pre-configured; with self-hosted CouchDB, you enable it in Step 3.
Step 3: End-to-End Encryption (E2EE)
Before syncing your notes to the server, you must secure them. How this works depends on your setup path:
Managed provider (EiraSync) — no manual E2EE setup
If you imported an EiraSync Setup URI in Step 2, both passphrases are already handled: the Setup URI passphrase unlocked the link; the E2EE passphrase was applied automatically from inside it.
Save your Setup URI and Setup URI passphrase somewhere safe. EiraSync does not store them after the setup dialog closes. If you lose them, you can generate a new link from the dashboard — but that is a full credential rotation (new CouchDB password and new E2EE passphrase), not a simple re-display.
Self-hosted CouchDB — choose your own encryption passphrase
- Enable the End-to-End Encryption option in LiveSync.
- Enter a strong, memorable passphrase of your choice.
- Apply the settings.
Important: Do not lose this passphrase. Without it, your synced data cannot be decrypted, even by your database administrator or hosting provider.
Step 4: Initial Replication
Once your connection is tested and encryption is active, the plugin needs to push your local notes to the database. Follow the prompts in the wizard to initialize the server and start the replication process.
Depending on the size of your vault, the initial replication may take anywhere from a few seconds to several minutes. Wait for the progress bar or sync indicator to complete. Your vault is now securely stored in the database.
Step 5: Connect Your Second Device
The easiest way to connect your smartphone or a second laptop is using a Setup URI.
Managed provider (EiraSync)
Use the same Setup URI and URI passphrase from your EiraSync dashboard on every device — do not generate a new link per device.
- On your second device: Open Obsidian, create a new empty vault, and install the LiveSync plugin.
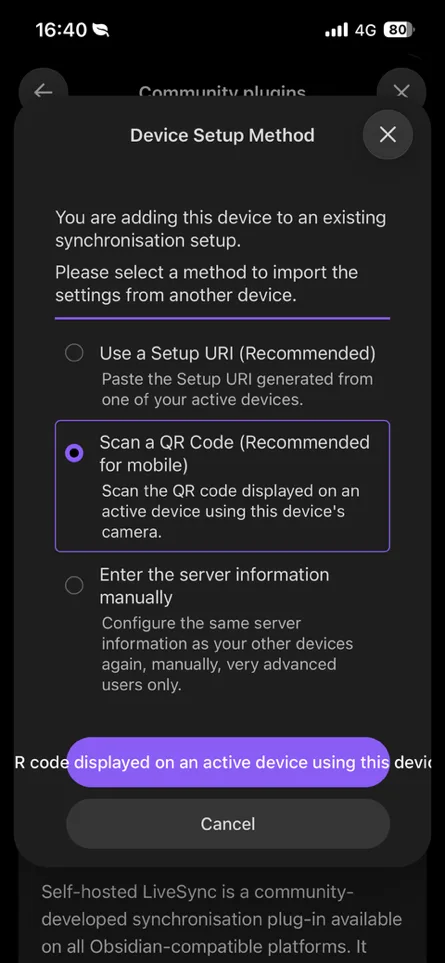
- When enabling the plugin, choose adding a device to an existing synchronisation setup, then paste the same Setup URI from your dashboard.
- Enter the same URI passphrase when prompted.
- When asked whether to upload local notes, choose No (fetch from the server) — your primary device already uploaded them.
Self-hosted CouchDB
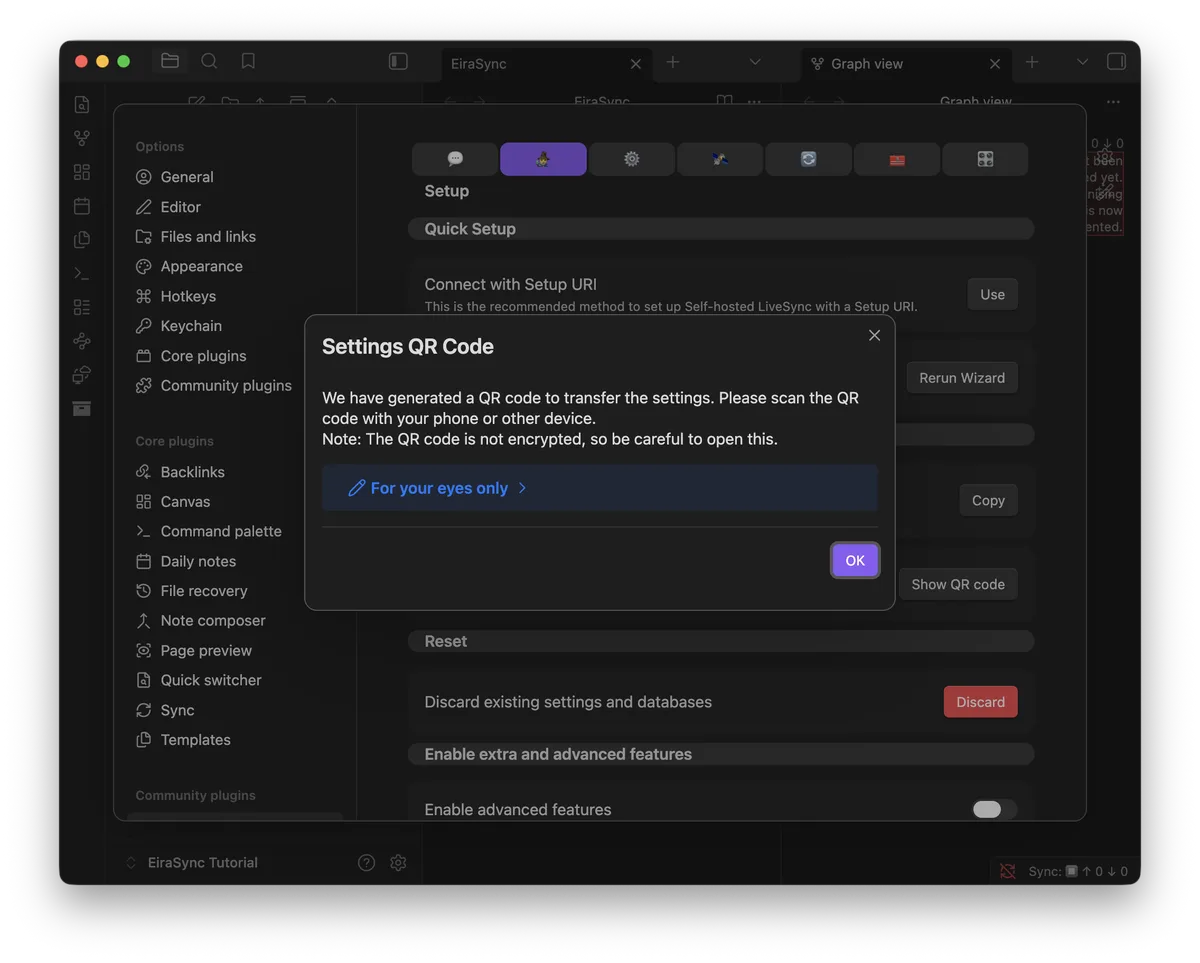
- On your primary device: Navigate to the LiveSync settings and locate the Setup URI section. Generate a Setup URI or a QR code. Make sure to include your E2EE passphrase for a seamless transfer.
- On your second device: Open Obsidian, create a new empty vault, and install the LiveSync plugin.
- Scan or paste: When enabling the plugin, choose adding a device to an existing synchronisation setup, then Scan a QR Code or paste the Setup URI.
The plugin will automatically configure your server settings, apply your passphrase, and download your entire vault.
Screenshots below: generating a Setup URI QR code from LiveSync on your primary device (self-hosted path). With EiraSync, paste the same dashboard link on each device instead.
Frequently Asked Questions
Is Obsidian LiveSync free?
Yes. The plugin itself is free and open source. However, it requires access to a CouchDB database, which you can either self-host or obtain from a managed provider.
Does LiveSync support end-to-end encryption?
Yes. Your notes are encrypted locally before they are uploaded to the database. The database stores only encrypted data.
With EiraSync, a Setup URI passphrase and an E2EE passphrase are generated for you — neither is chosen manually. With self-hosted CouchDB, you pick and manage that passphrase in LiveSync.
Does LiveSync work without EiraSync?
Yes. LiveSync is completely independent and open source. You can connect it to any compatible CouchDB database, whether self-hosted or provided by a managed hosting service.
Can I use LiveSync on iPhone?
Yes. LiveSync works on iOS and Android. Using the Setup URI makes adding a mobile device much easier.
Is LiveSync better than iCloud?
It depends on your needs. LiveSync is designed specifically for continuous synchronization of Obsidian vaults and generally provides a more reliable experience than general-purpose file synchronization services, especially when working across multiple devices.
Can I switch from iCloud to LiveSync?
Yes. Back up your vault first, configure LiveSync on your primary device, let the initial replication complete, and then connect your other devices using the Setup URI. Once everything is working as expected, you can stop using iCloud for that vault.
Which setup option should you choose?
| Option | Best for |
|---|---|
| Self-hosted CouchDB | Users who enjoy running their own infrastructure |
| Managed CouchDB (e.g. EiraSync) | Users who want LiveSync without server maintenance |
Final Thoughts
Whether you self-host CouchDB or use a managed provider, LiveSync remains one of the fastest and most reliable ways to synchronize an Obsidian vault. Once the initial setup is complete, the synchronization process largely disappears into the background, letting you focus on your notes instead of your infrastructure.
If you prefer not to operate your own CouchDB server, EiraSync provides a managed backend built specifically for the LiveSync workflow.
Read our dedicated EiraSync Setup Guide to get your fully managed database running in just a few clicks.
If you like the LiveSync approach but don't want to maintain your own CouchDB server, you can try EiraSync free for 14 days.
Related Guides
If you're still deciding which synchronization method is right for you, these guides may help: